Creating Android Pay Mobile Passes
Remember, the Android Pay mobile passes creation is a beta feature, so many small features related to it may not be fully available yet.
We’re constantly improving the integration with Android Pay, especially the creation flow. So, if you find anything that is not working as expected, please let us know.
If you arrived here, you’re probably about to create mobile passes targeted to the Android Pay platform. In case you haven’t yet fully understand the concepts, please see our Introduction to Android Pay page and then return to the creation process.
Aiming to give you a fast and practical way to create mobile passes for the Android Pay, we’ve used the current Apple Wallet (formerly Passbook) flow to creating them, as you might know, the passes are not visual maching, however the fields available follow the same structure.
In order to create mobile passes for Android Pay, just follow these steps:
Choose a campaign type
Following the actual flow, the first action is to choose a campaign type. So far the supported types are:
- Coupon (Android Pay Offer)
- Membership (Android Pay Loyalty)
Confused with the pass name and types? Check our Pass Types page with the compatibility table.
After choosing one of these options, you should guarantee if the “Allow Android Pay” is checked, as follows:
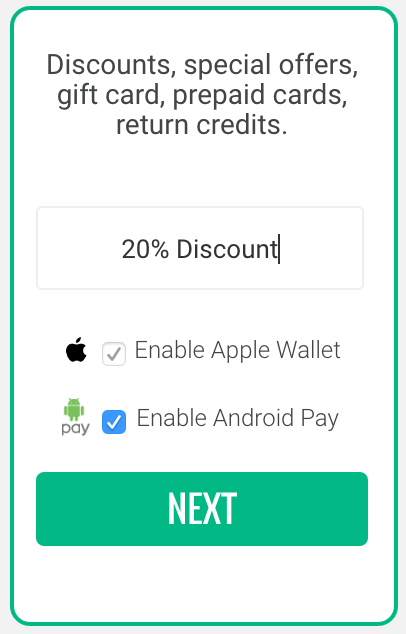 Figure 1 - New Campaign With Android Pay
Give your campaign a descriptive name and click ‘Next’
Design Pass
The preview for the creation of a Android Pay template is not available yet, however, our current flow to creating passes uses the preview for interacting and filling the pass template and data. So you should, temporarily, interact with the Apple Preview for creating the fields.
Remember: You don’t have to limitate the pass creation by the visual on the preview. It’s expecting a Apple Wallet (formerly Passbook) information (witch differs on field size limitations). So, don’t worry about the look and feel here and focus on the final pass.
It is worth reading the Android Pay documentation regarding the pass structure and how all this information is going to be rendered.
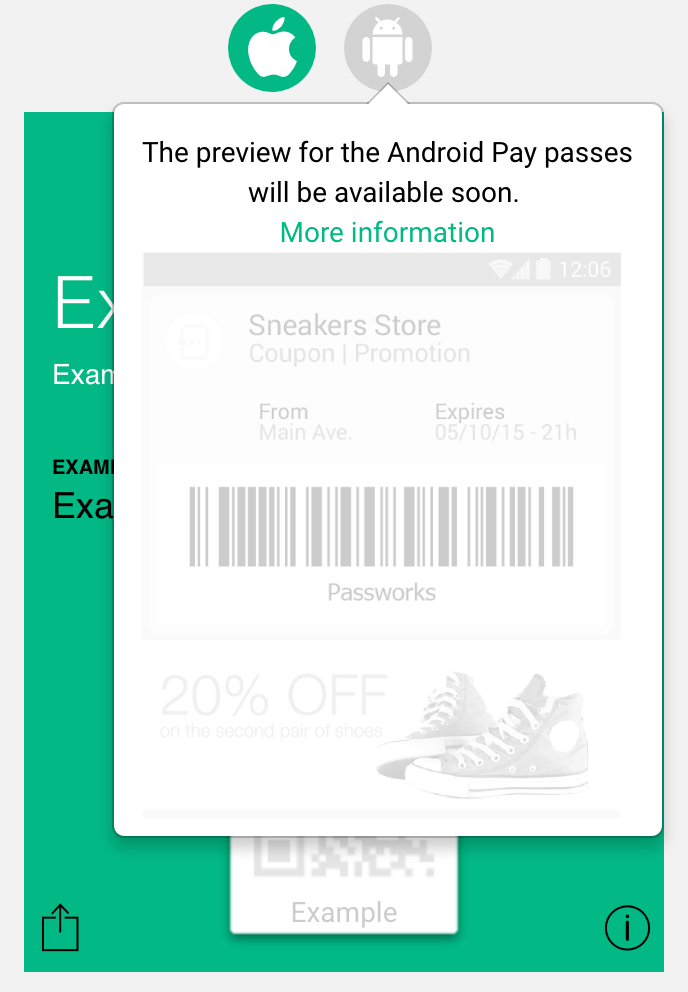 Figure 2 - Preview information
Colors
In the first release of Google Wallet, it was possible to choose the pass colors (background and text colors), however it was deprecated since the migration to Android Pay.
The pass color rendered at the devices will be retrieved from the Icon image you’ll associate with it. The algoright used try to figure the dominant color out and set it as background color.
We’ll son release the Android Pay designer template creator with the same algoright associated so as soon as you choose the icon’s image, we’ll check for the right color.
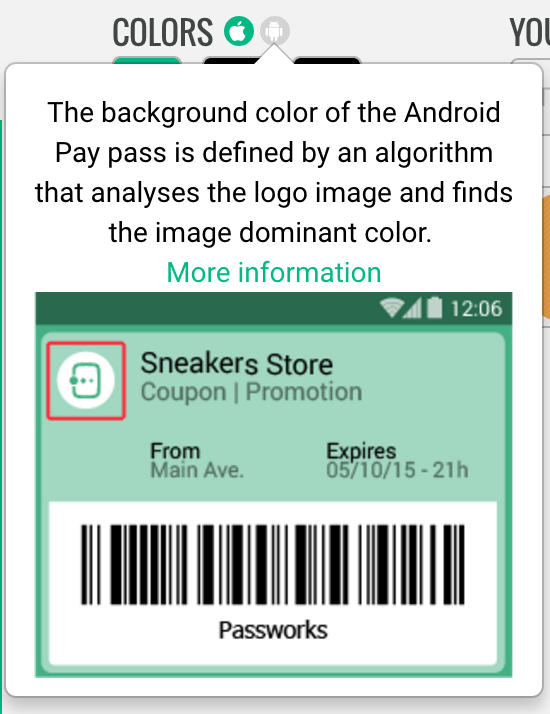 Figure 3 - Choosing colors
Headers
The Notification Title and Logo Text will be used as the pass title, if this information is not defined, the Campaign Name and Organization Name will be used instead.
![]() Figure 4 - Header Fields
Figure 4 - Header Fields
Images
For the Android Pay passes, you can use an Icon and a Strip Image.
As mentioned before, the Icon is essencial as the pass color is defined based on this image and, of course, it’s your brand name here.
The strip image will be shown as the first item when navigatin to the pass detail.
The strip image doesn’t have a constraint ratio defined for its size, so very long images are allowed. Take care while choosing it.
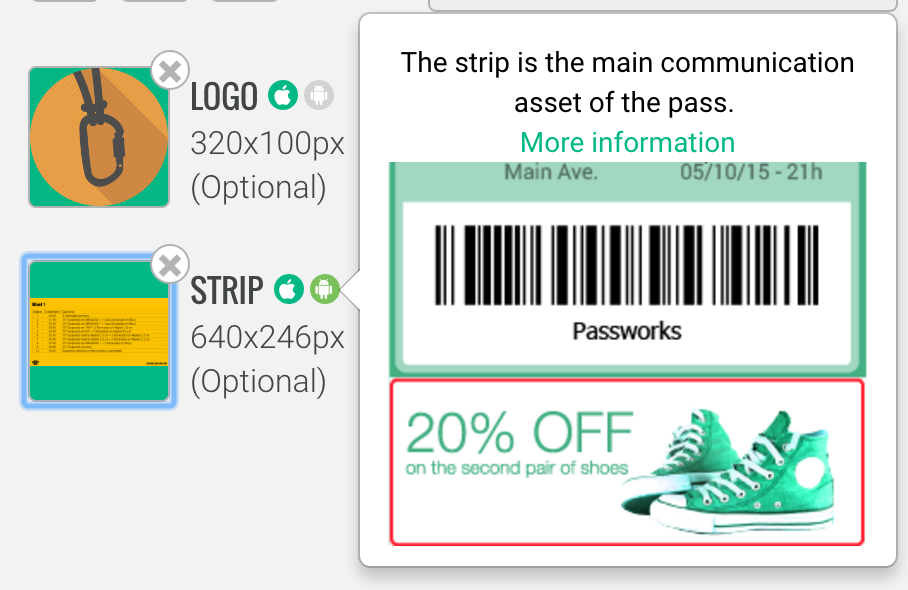 Figure 5 - Strip Image
Pass Content
Once again, it is worth reading the Android Pay documentation regarding the pass structure and how all this information is going to be rendered.
Text fields
Right after the image, it may list a set of title/desctiption used for depict all the pass information. As the current template creator can define multiple fields (at different positions)
We tried to order the fields the the Android Pay as they are currently defined at the Pass Designer. The order is:
- Header Fields
- Primary Fields
- Secondary Fields
- Auxiliary Fields
- Back Fields
All those fields are basicaly key/value and neither of those have restrictions about the title or description text size.
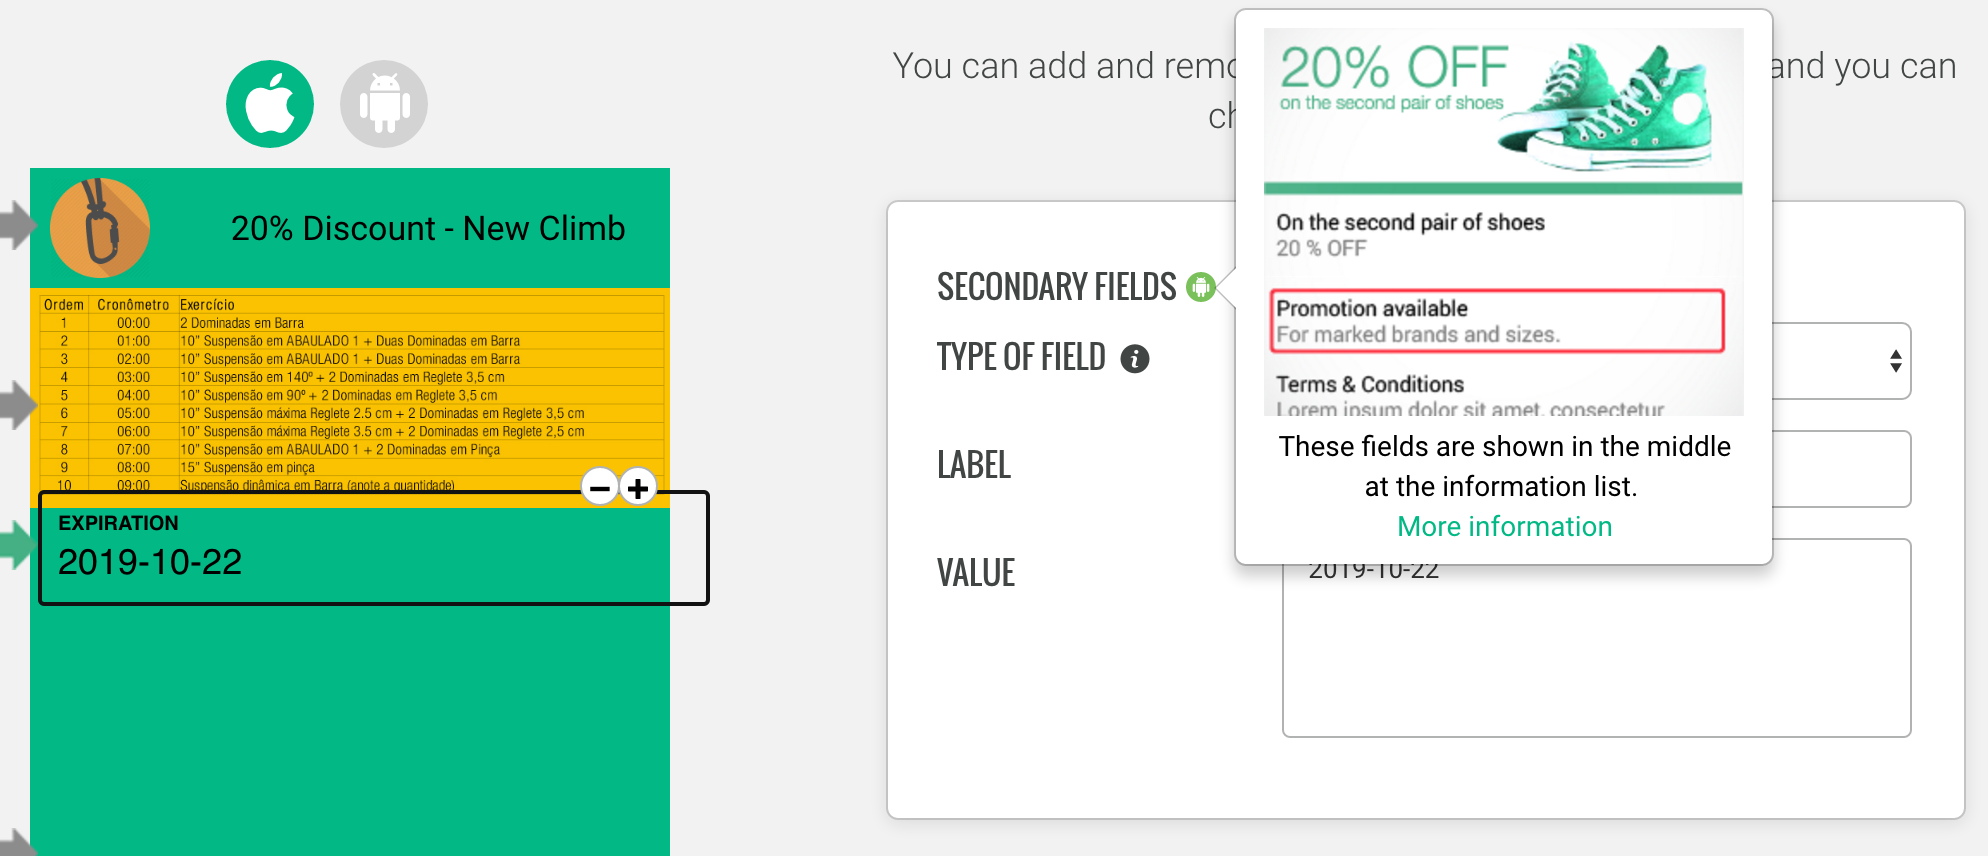 Figure 6 - Text Fields
The links
The “backfields” have a special behaviour, here at Android Pay you have the Links session where you can add links, phones or map points, we made it available through the “backfeields”, and for using it you simply have to use these references:
http*creates a link (title: link text, value: URL)*maps.google*creates a pointer (title: pointer text, value: URL)tel:*creates a link to a phone (title: link text, value: NUMBER)
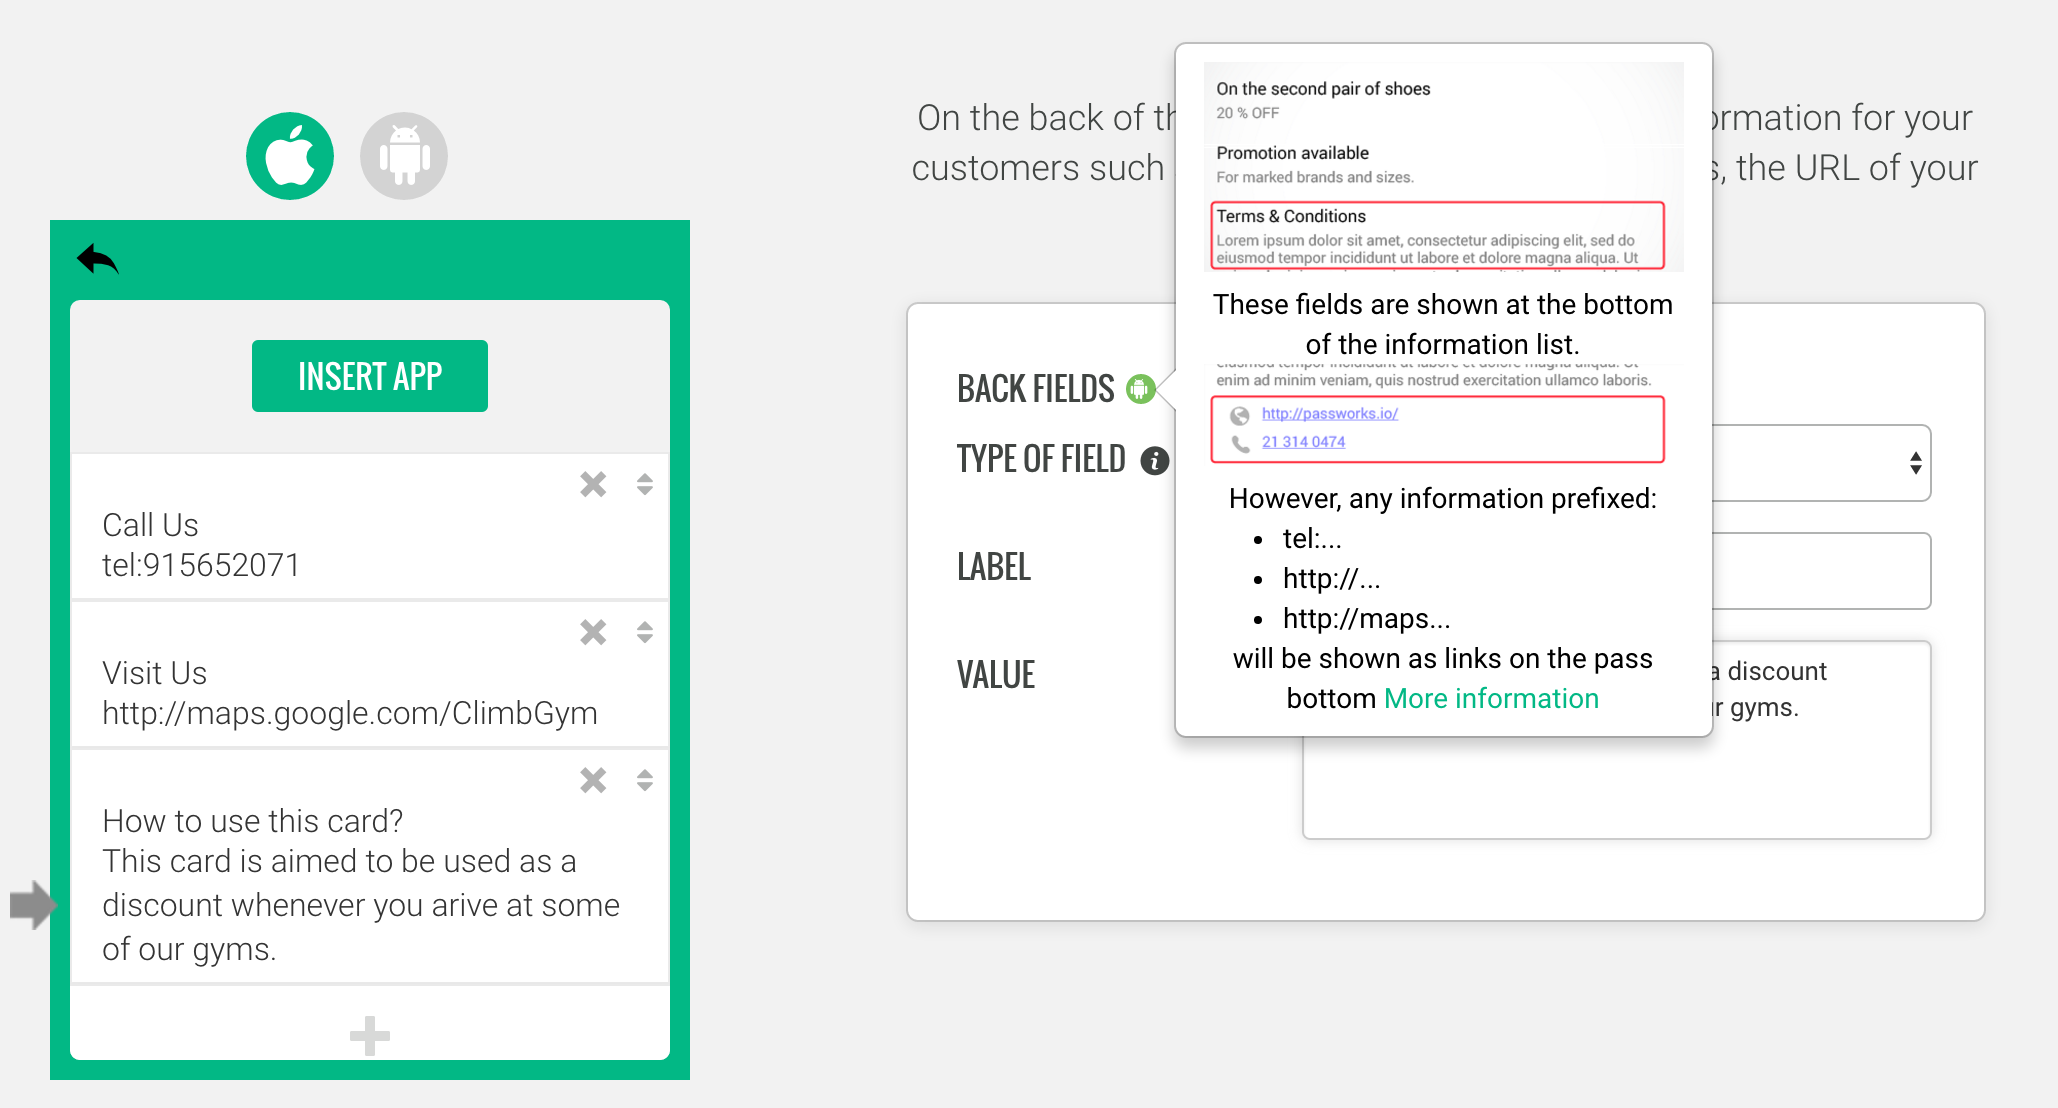 Figure 7 - Backfields
For more information check the Android Pay UX References
Barcode
All barcode types we supported at Apple Wallet (Passbook) are also supported for Android. You can choose it from the barcode selection area. The actual options are:
- QrCode
- Aztec
- PDF417
- Code 128
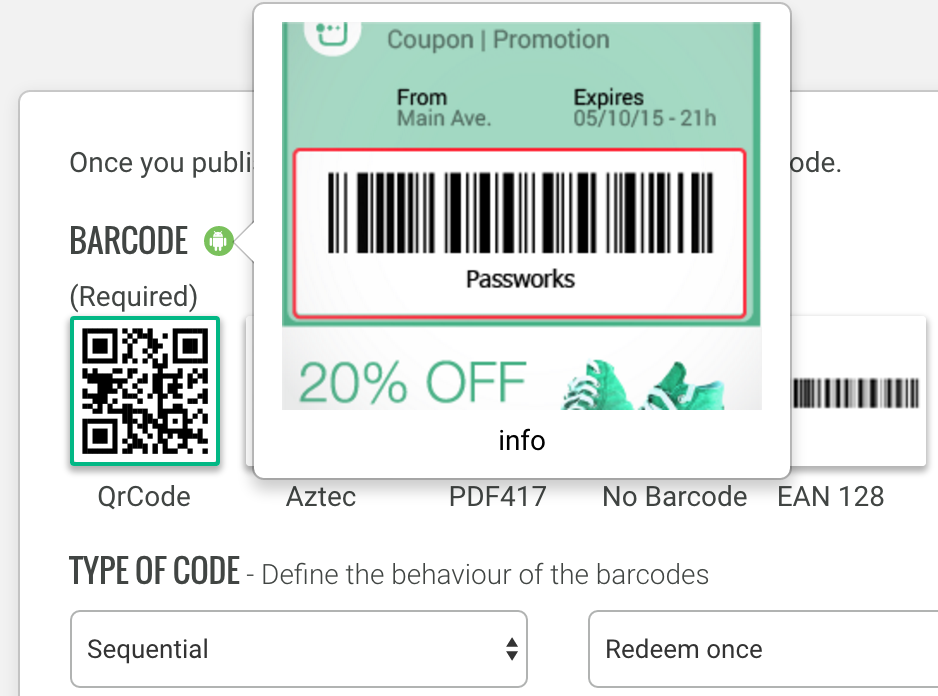 Figure 8 - Barcodes
Check our Supported Barcodes page with a complete list and detailed information about each barcode type.
Geolocation!
You can define up to 10 locations where a notification is going to pop at the holder’s device.
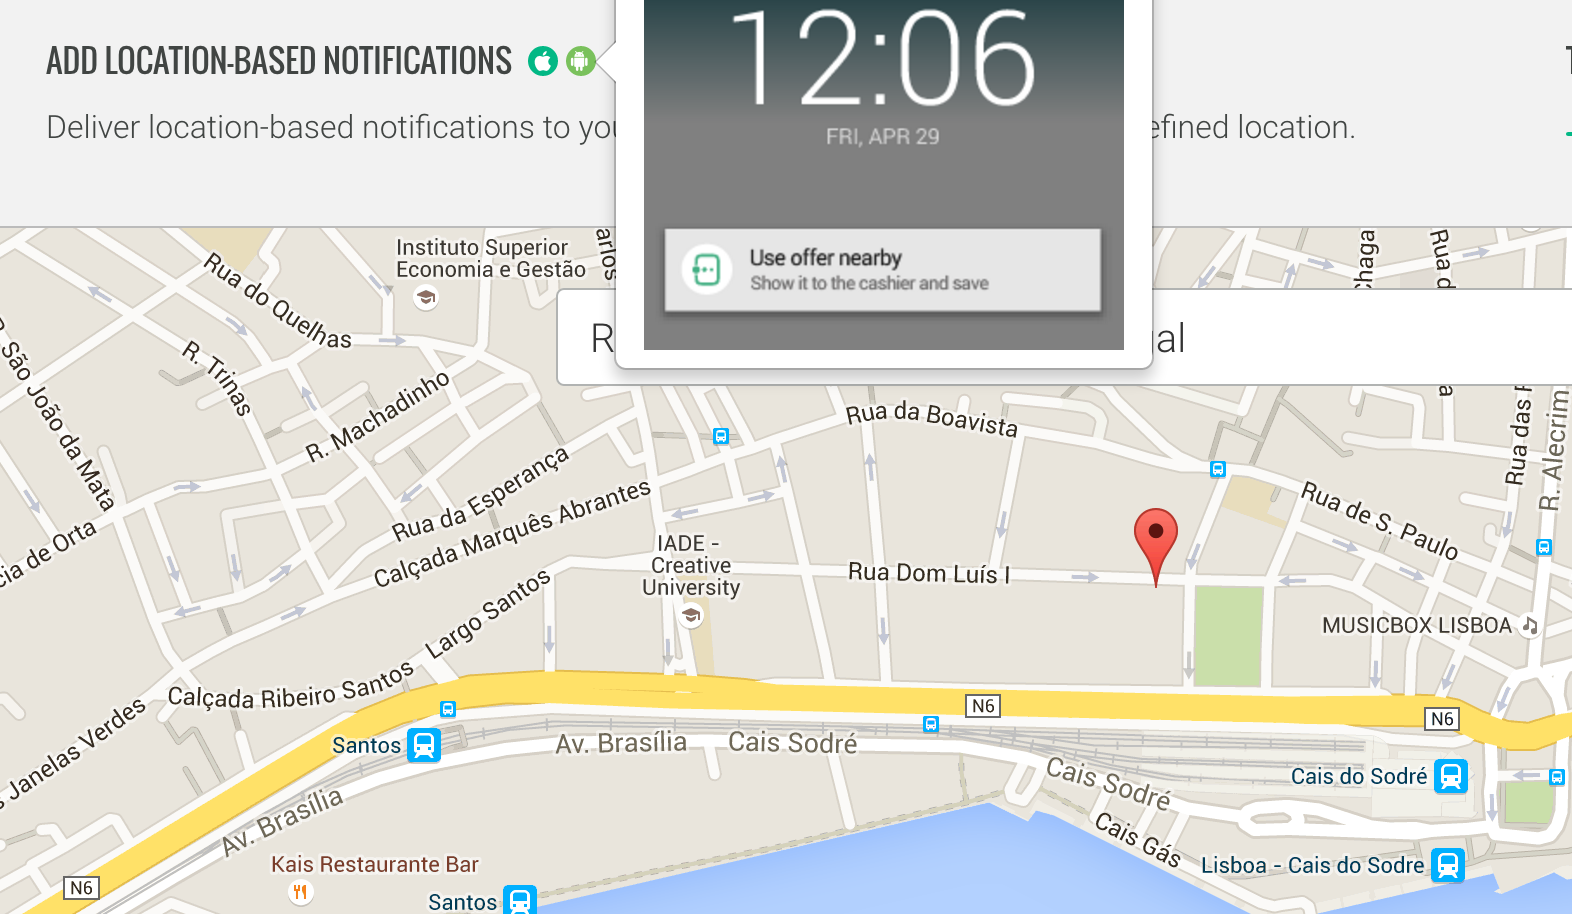 Figure 9 - Adding Locations
Remember: There is no support for Push Notifications at the Android Pay.
Even without push notifications, the users are informed that they are nearby a pass’ merchant here is how it’ll be shown on user’s device:
![]() Figure 10 - Header icon notification
Figure 10 - Header icon notification
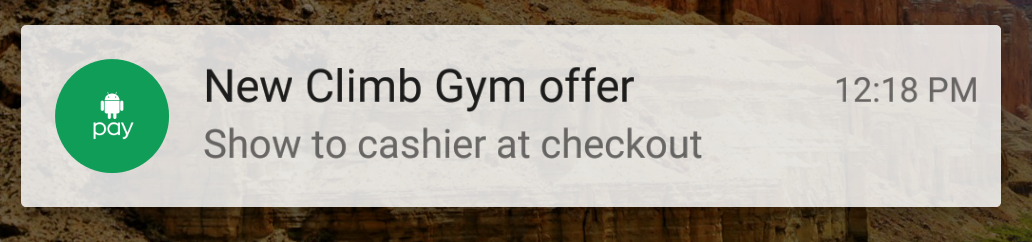 Figure 11 - Lock screen information
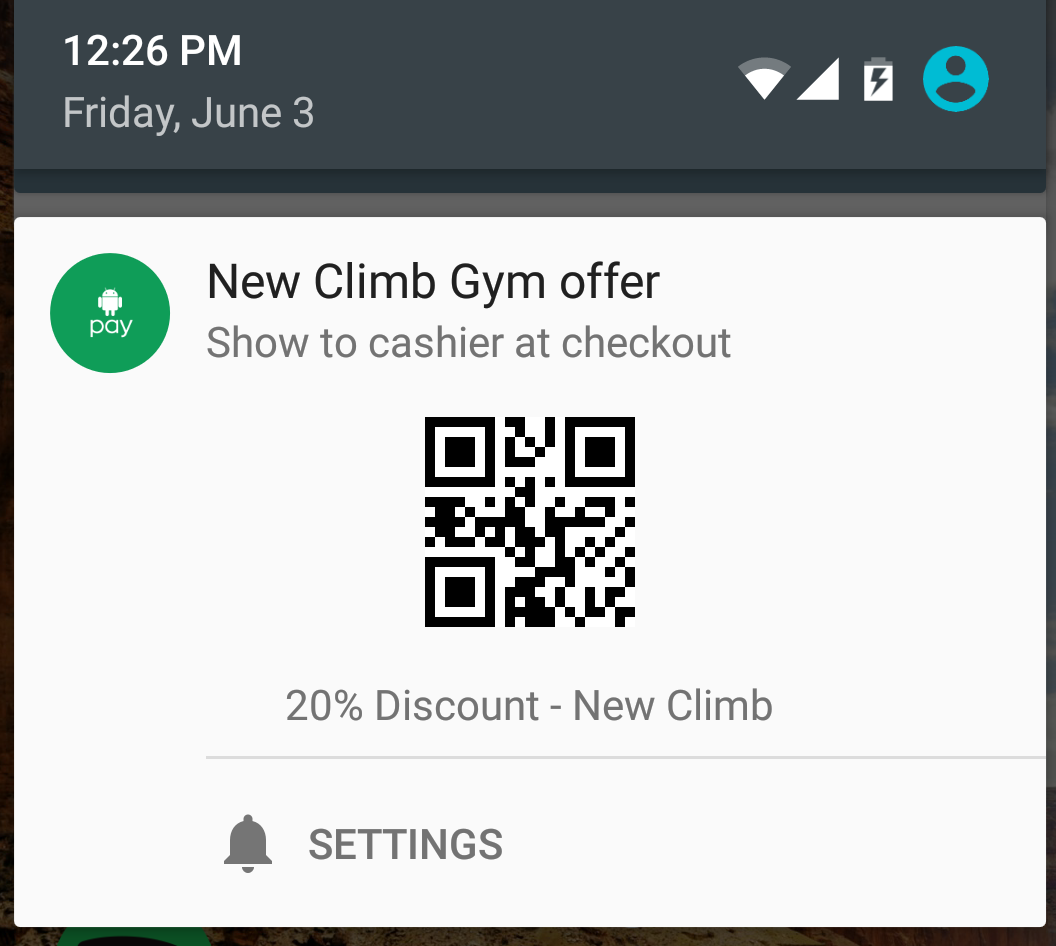 Figure 12 - Notification preview
Remember: There is no support for Beacons at the Android Pay
Publish & Install
After filling all the information, just publish the campaign and you’ll something like this:
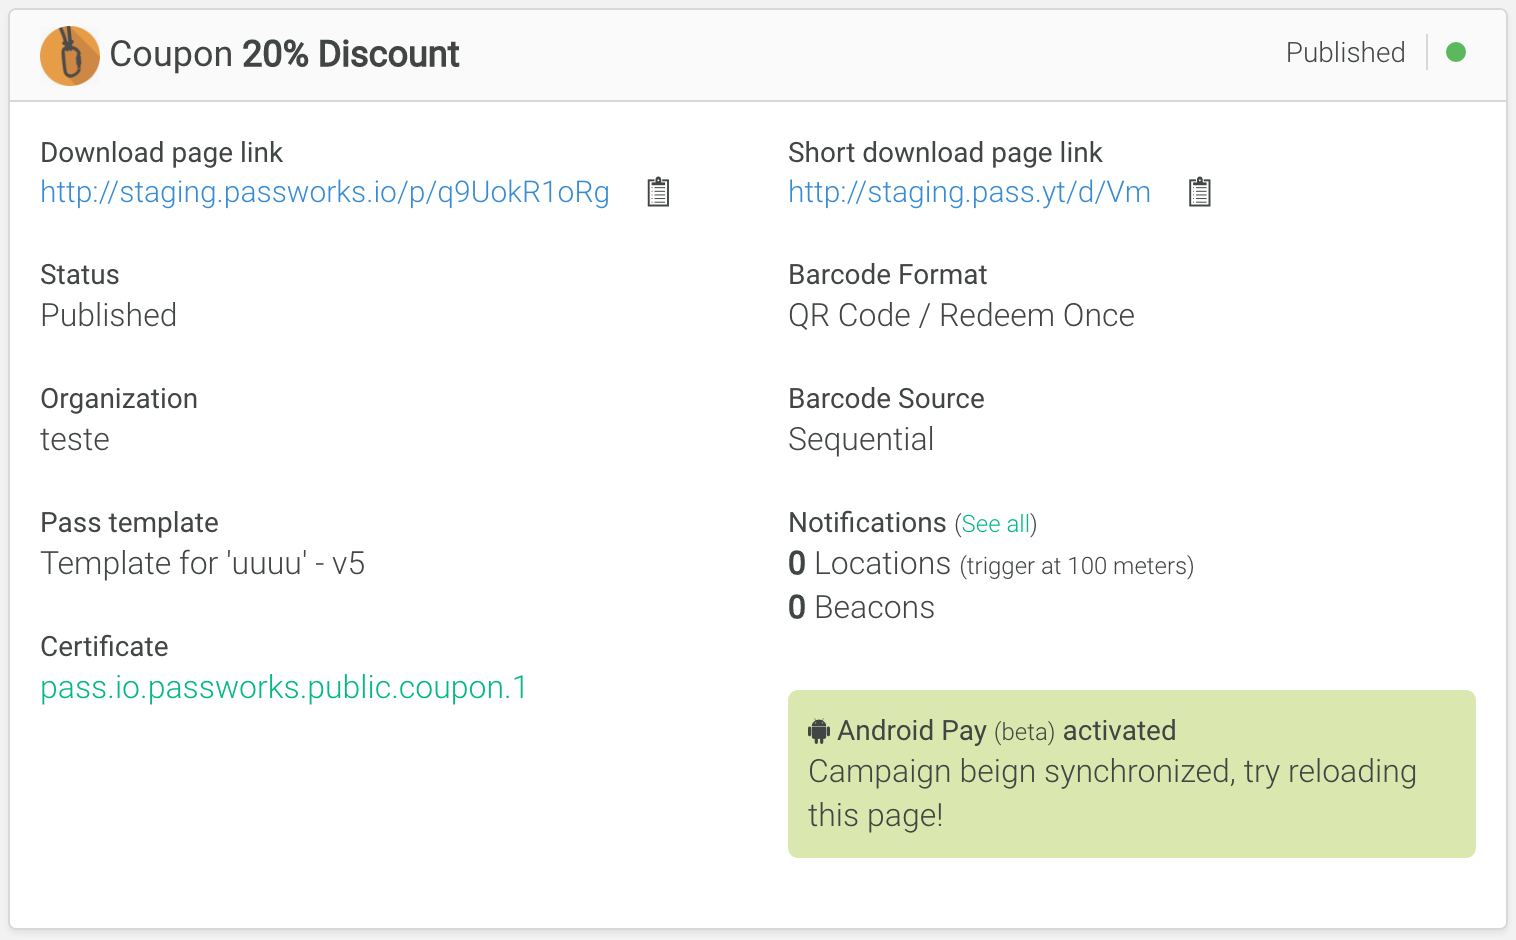 Figure 13 - Notification preview
At this very moment, our service will start to synchronize the pass information with the Android Pay Servers.
The synchronization may take some moments to be done, at this time you wont be able to install the passes on the Android Pay.
You can reload the page and check the status:
 Figure 14 - Sync done
It’s done, now you can share your distribution link or passes and the users can install it to theirs Android Pay App.
Errors
If any kind of error happen, a link for trying another sync should appear. Our tech team will probably be notified in advance.
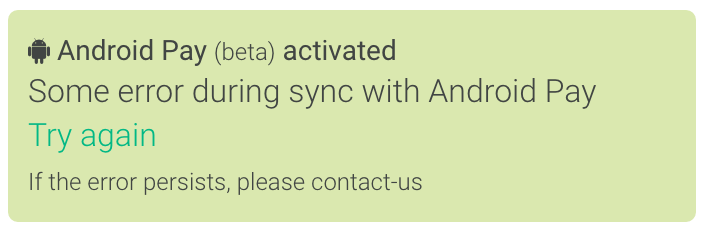 Figure 14.1 - Sync error
Distribution
Remember: The download pages for Distribution and Pass are the same. The only difference is that at the Distribution page, when a user clicks for download the Apple Wallet pass, it creates a new pass and then push it to the user.
As the instalation of the pass to the user’s Android Pay app is managed by Google, the pass should be created before displaying the Save To Pay button. At this point the pass is not created yet, so is first shows a “I have Andodroid Pay”
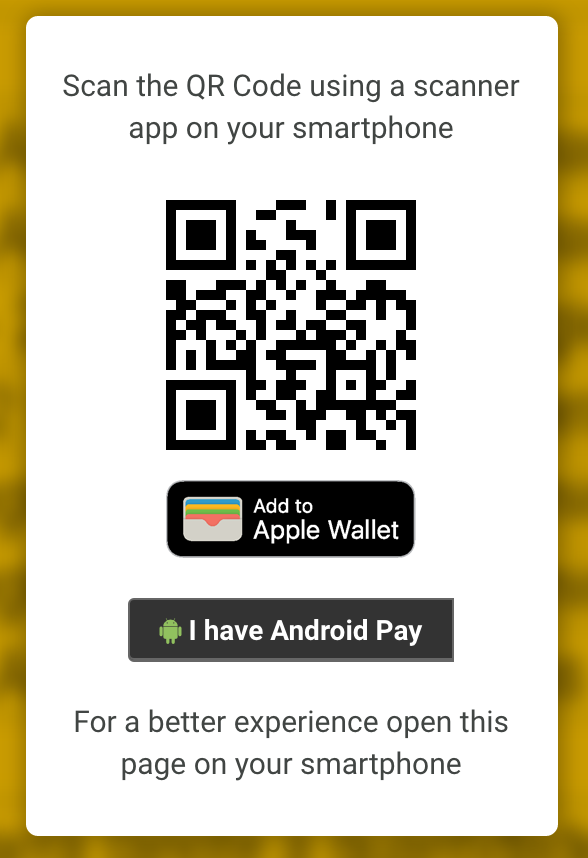 Figure 15 - Default distribution page
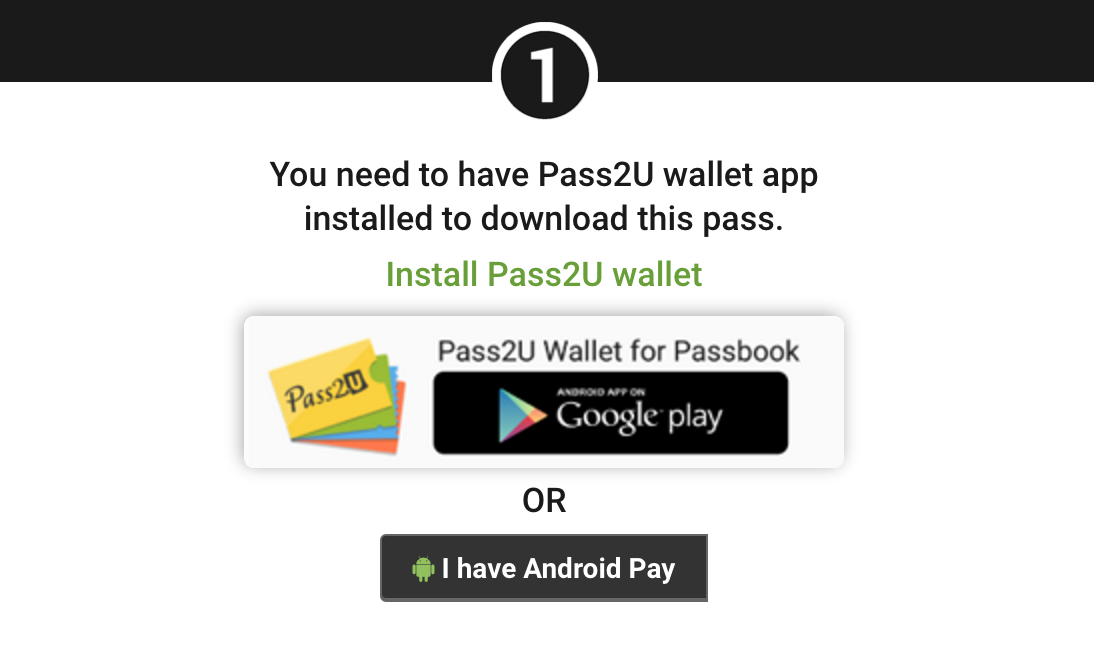 Figure 16 - Anrdoid distribution page
Right after the user clicks at the button, the pass then will be created and the button should change to “Save to Pay”
Passes
The user will either click at the “I have Android Pay” button or follow a direct link and then click at the “Save to Pay” button fot actually installing the pass to its Android Pay app.
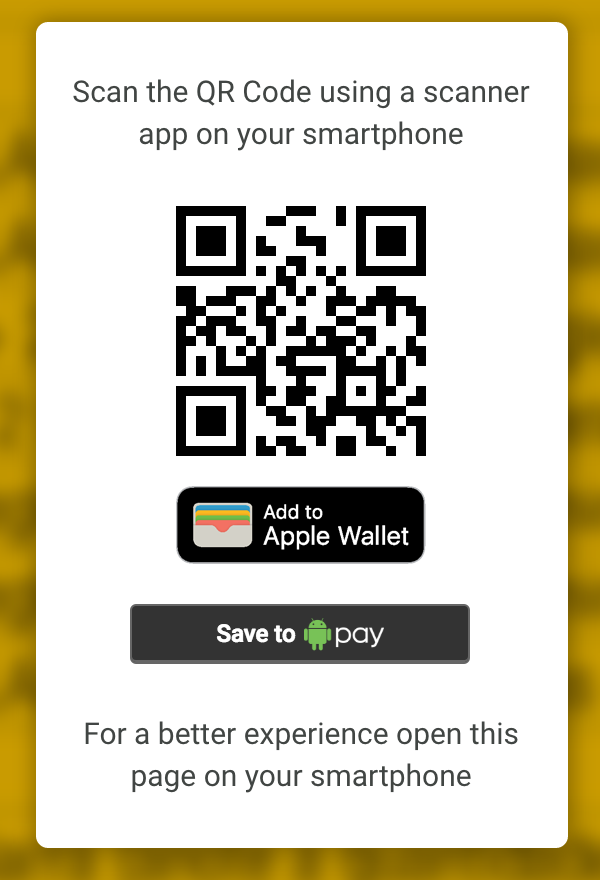 Figure 17 - Save To Pay Default Page
Google Accounts
As mentioned on the Introduction, in order to install the pass you must have a Google Account.
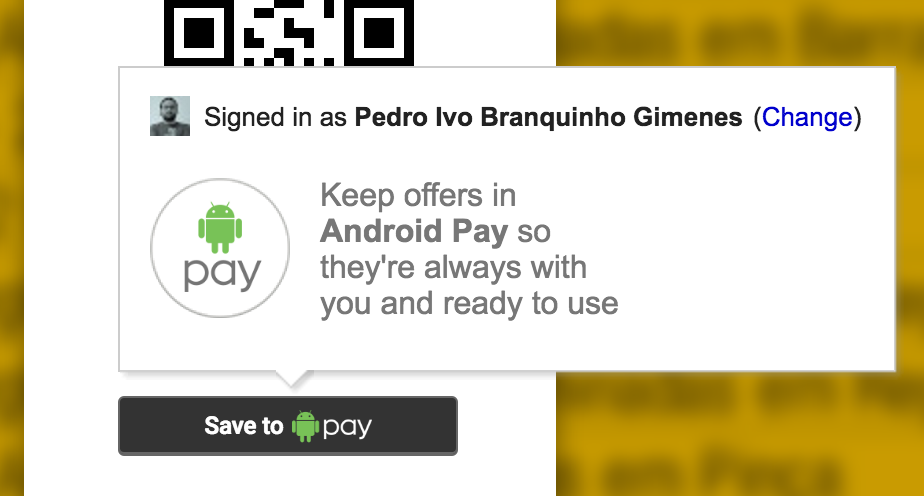 Figure 18 - Google Account Required
If you’re not logged into any Google Account, the popover will give all the instructions to login and then install the pass.
After the pass get really installed, the button will tell you so and suggest you either get the app or directly show it if you are using a device with Android Pay app installed.
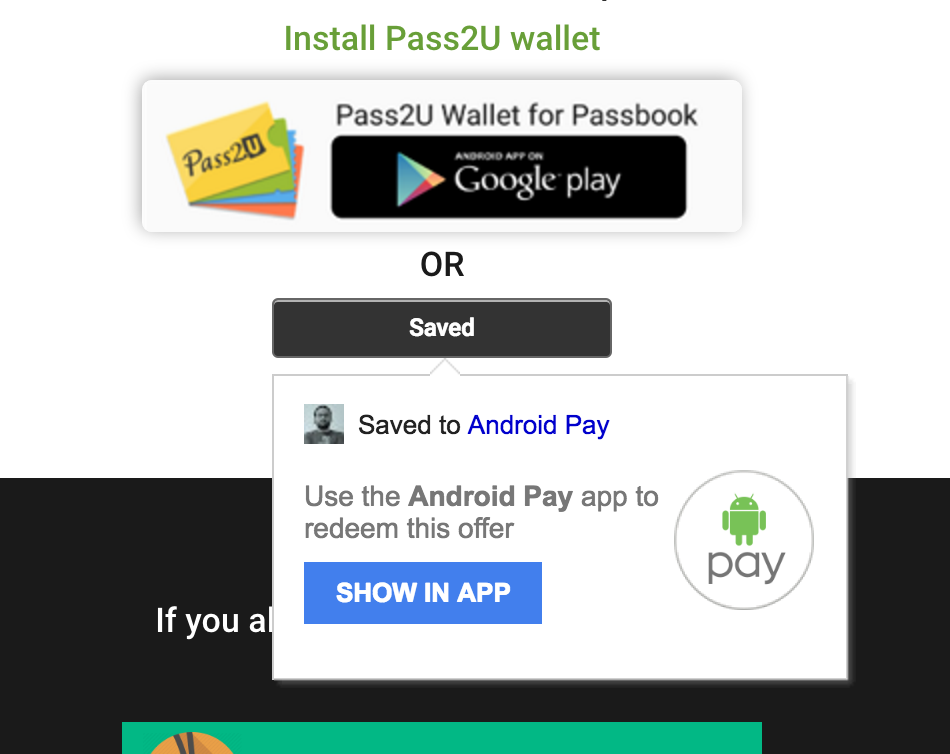 Figure 19 - Saved to Pay Android Page
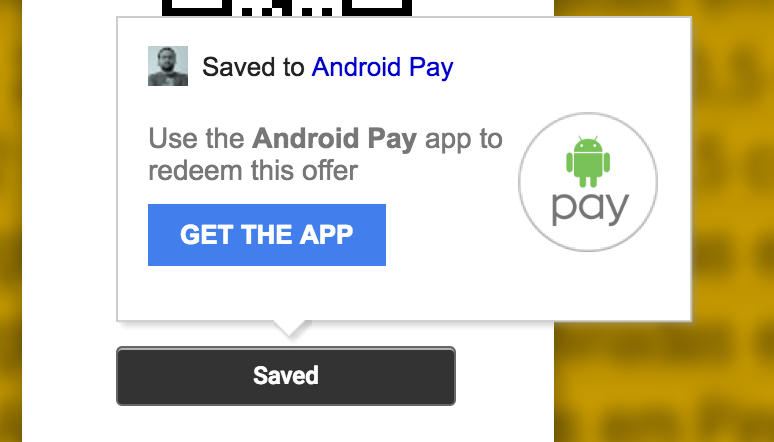 Figure 20 - Saved to Pay Default Page
If you want to see how the passes are shown at the Android Pay app, check the Installing Android Pay Passes
Updating passes & Campaigns
Right after you publish the campaign update, we will notify the Android Pay services with the updates and it will automatically be updated on the user’s devices.