Installing Android Pay Passes
Instalation
Distribution
Remember: The download pages for Distribution and Pass are the same. The onlu difference is that at the Distribution page, when a user clicks for download the Apple Wallet pass, it creates a new pass and then push it to the user.
As the instalation of the pass to the user’s Android Pay app is managed by Google, the pass should be created before displaying the Save To Pay button. At this point the pass is not created yet, so is first shows a “I have Andodroid Pay”
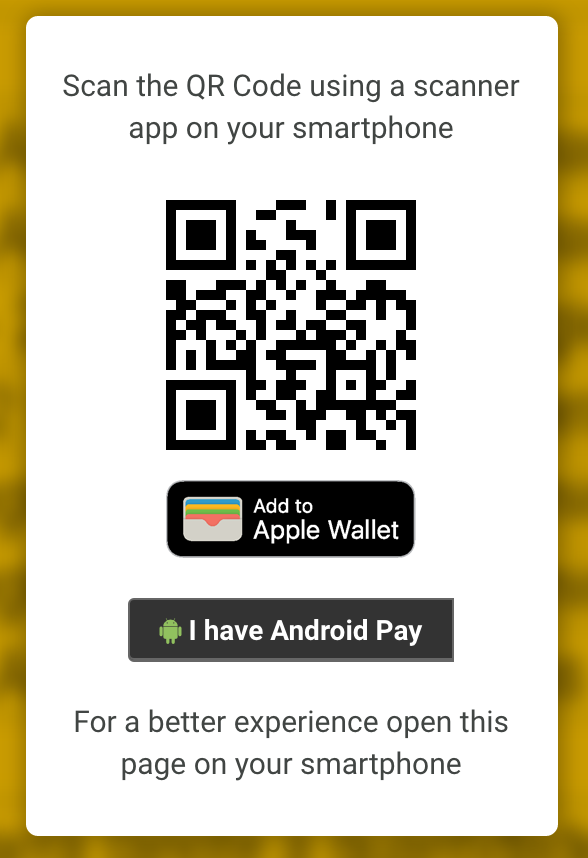 Figure 15 - Default distribution page
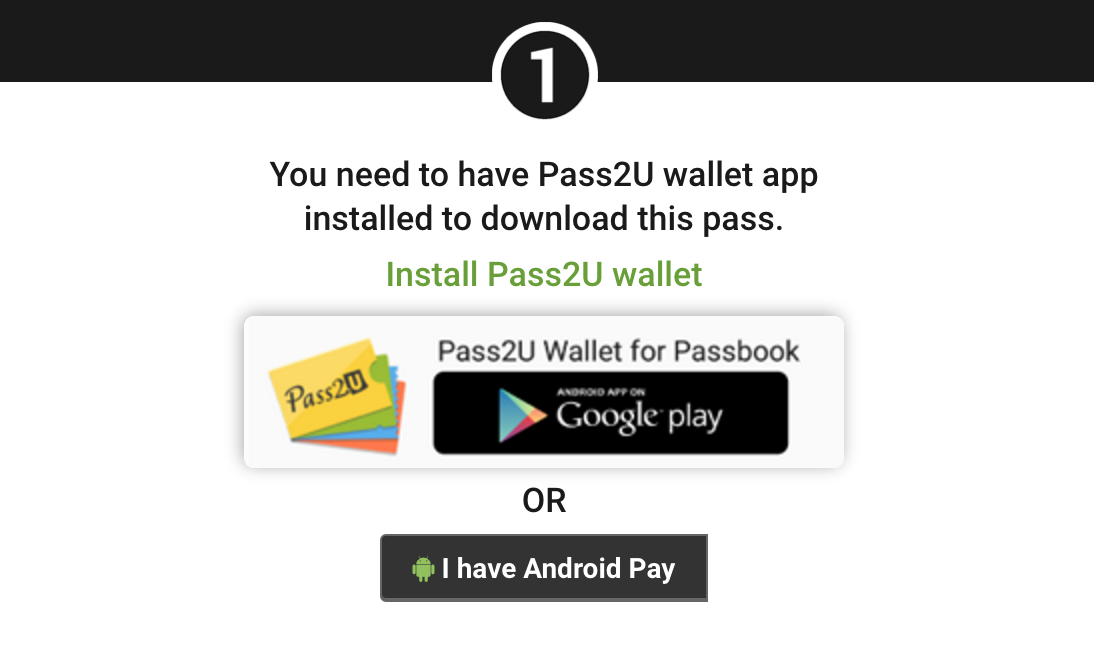 Figure 16 - Anrdoid distribution page
Right after the user clicks at the button, the pass then will be created and the button should change to “Save to Pay”
Passes
The user will either click at the “I have Android Pay” button or follow a direct link and then click at the “Save to Pay” button fot actually installing the pass to its Android Pay app.
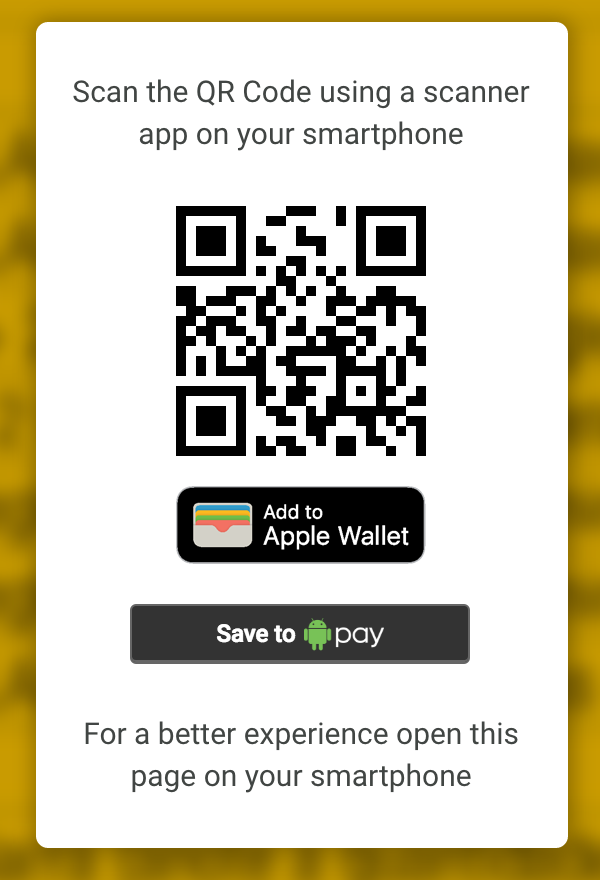 Figure 17 - Save To Pay Default Page
Google Accounts
As mentioned on the Introduction, in order to install the pass you must have a Google Account.
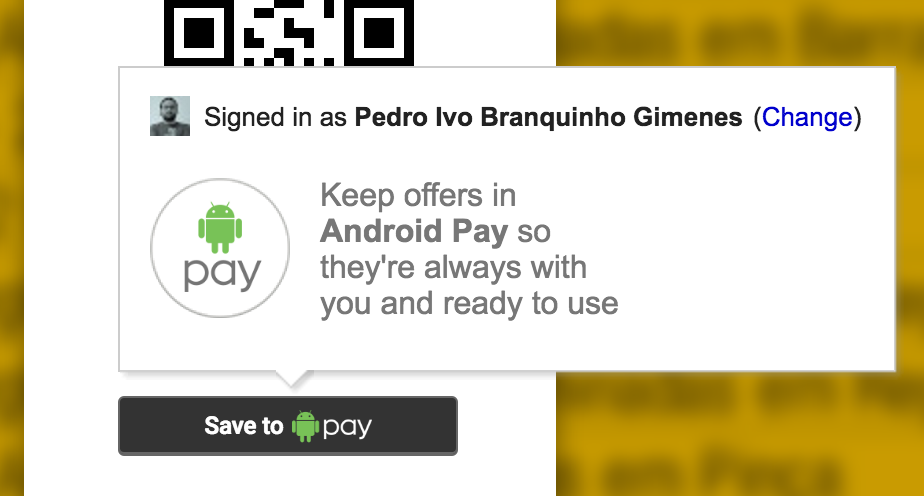 Figure 18 - Google Account Required
If you’re not logged into any Google Account, the popover will give all the instructions to login and then install the pass.
After the pass get really installed, the button will tell you so and suggest you either get the app or directly show it if you are using a device with Android Pay app installed.
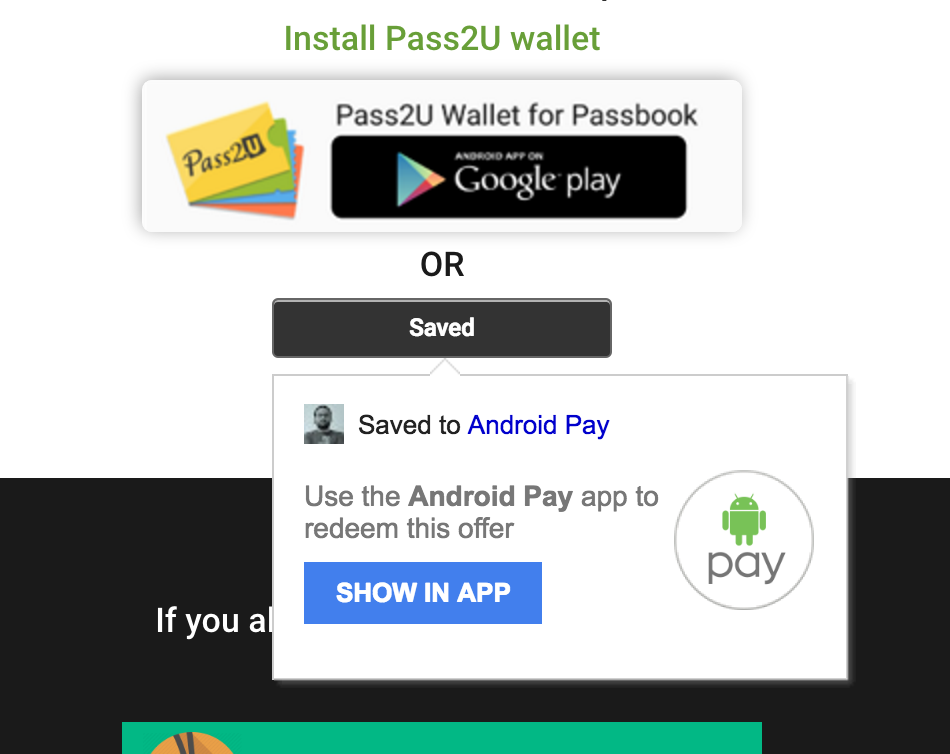 Figure 19 - Saved to Pay Android Page
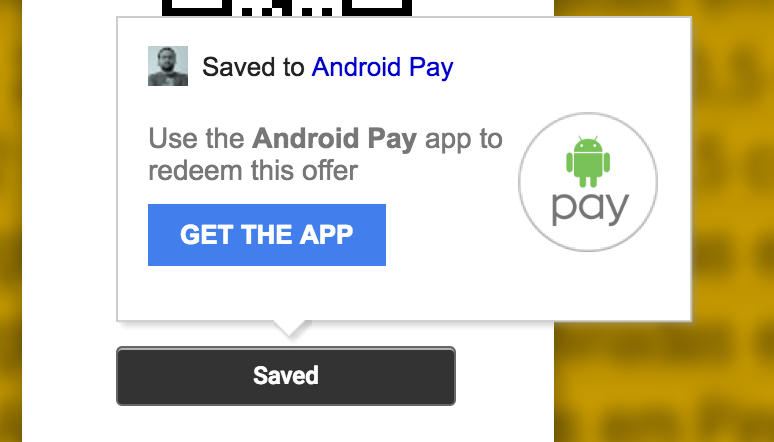 Figure 20 - Saved to Pay Default Page
If you want to see how the passes are shown at the Android Pay app, check the Installing Android Pay Passes
In the app
Remember: The user doesn’t have to have neither be using the Android Device to Install the pass to its Android Pay Account. However, in order to see or use it, the App is mandatory.
After clicking the “Save to Pay” button, the next time the user opens its Android Pay app (and it’s connected to the Internet) the pass should automatically be added to the list:
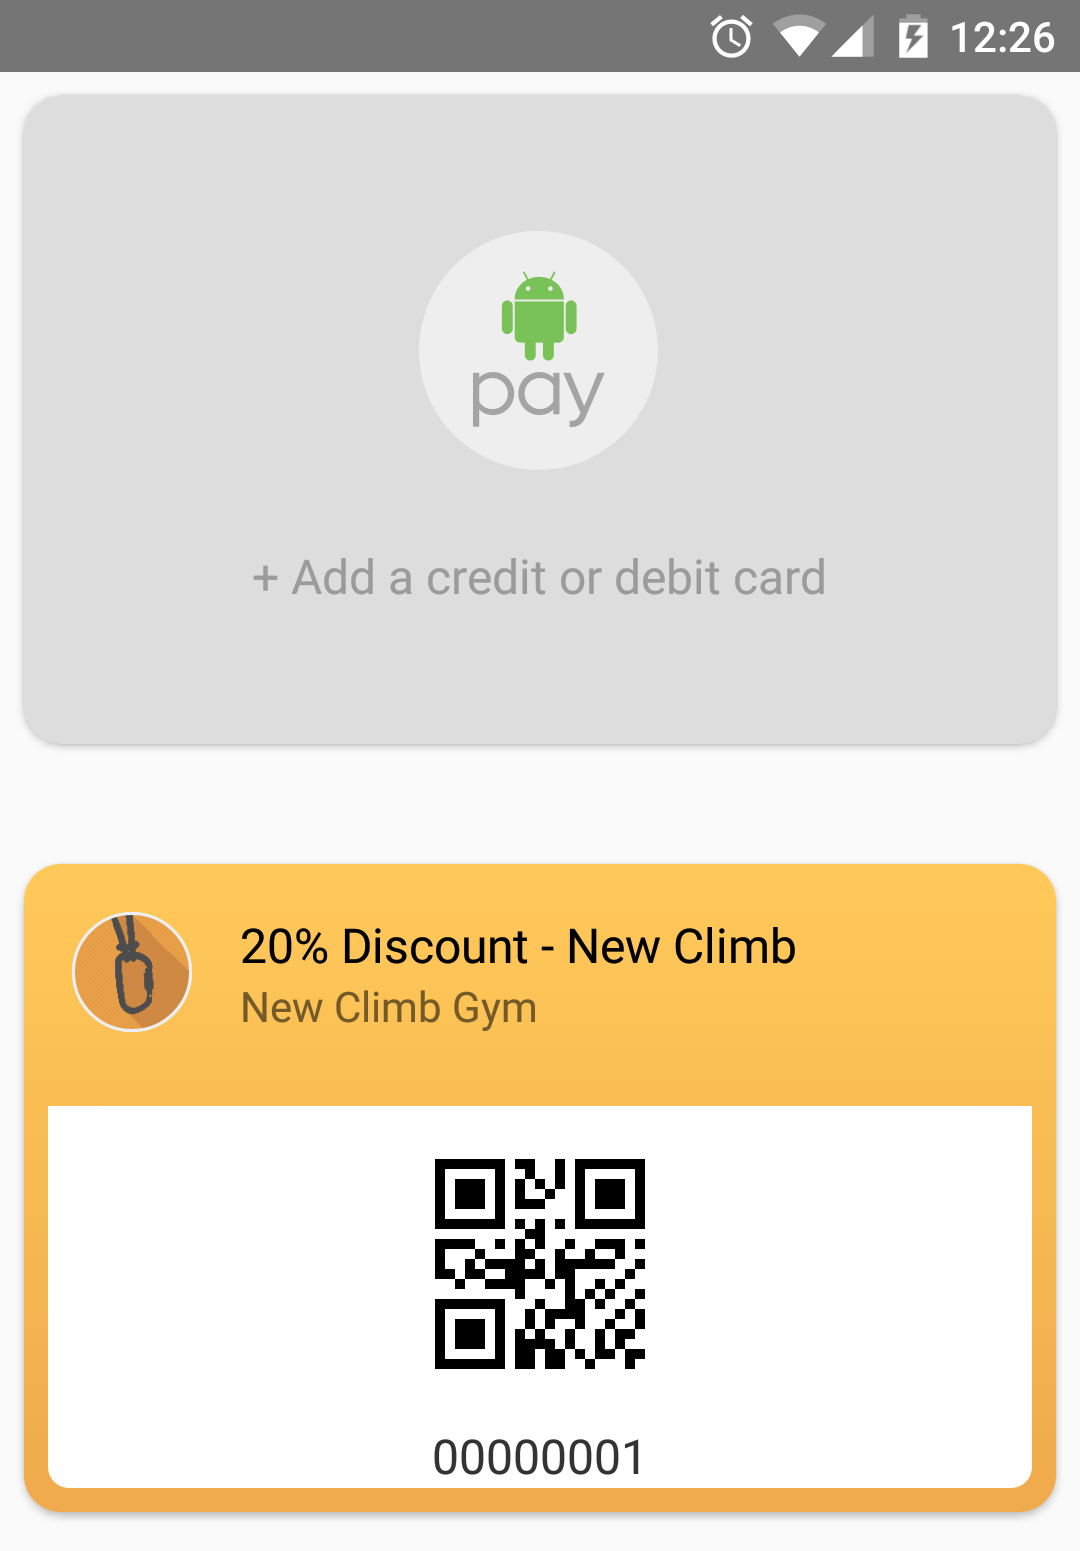 Figure 7 - Pass listing
To see the pass details, just navigate and tap one of them and you’ll see a brief about the details:
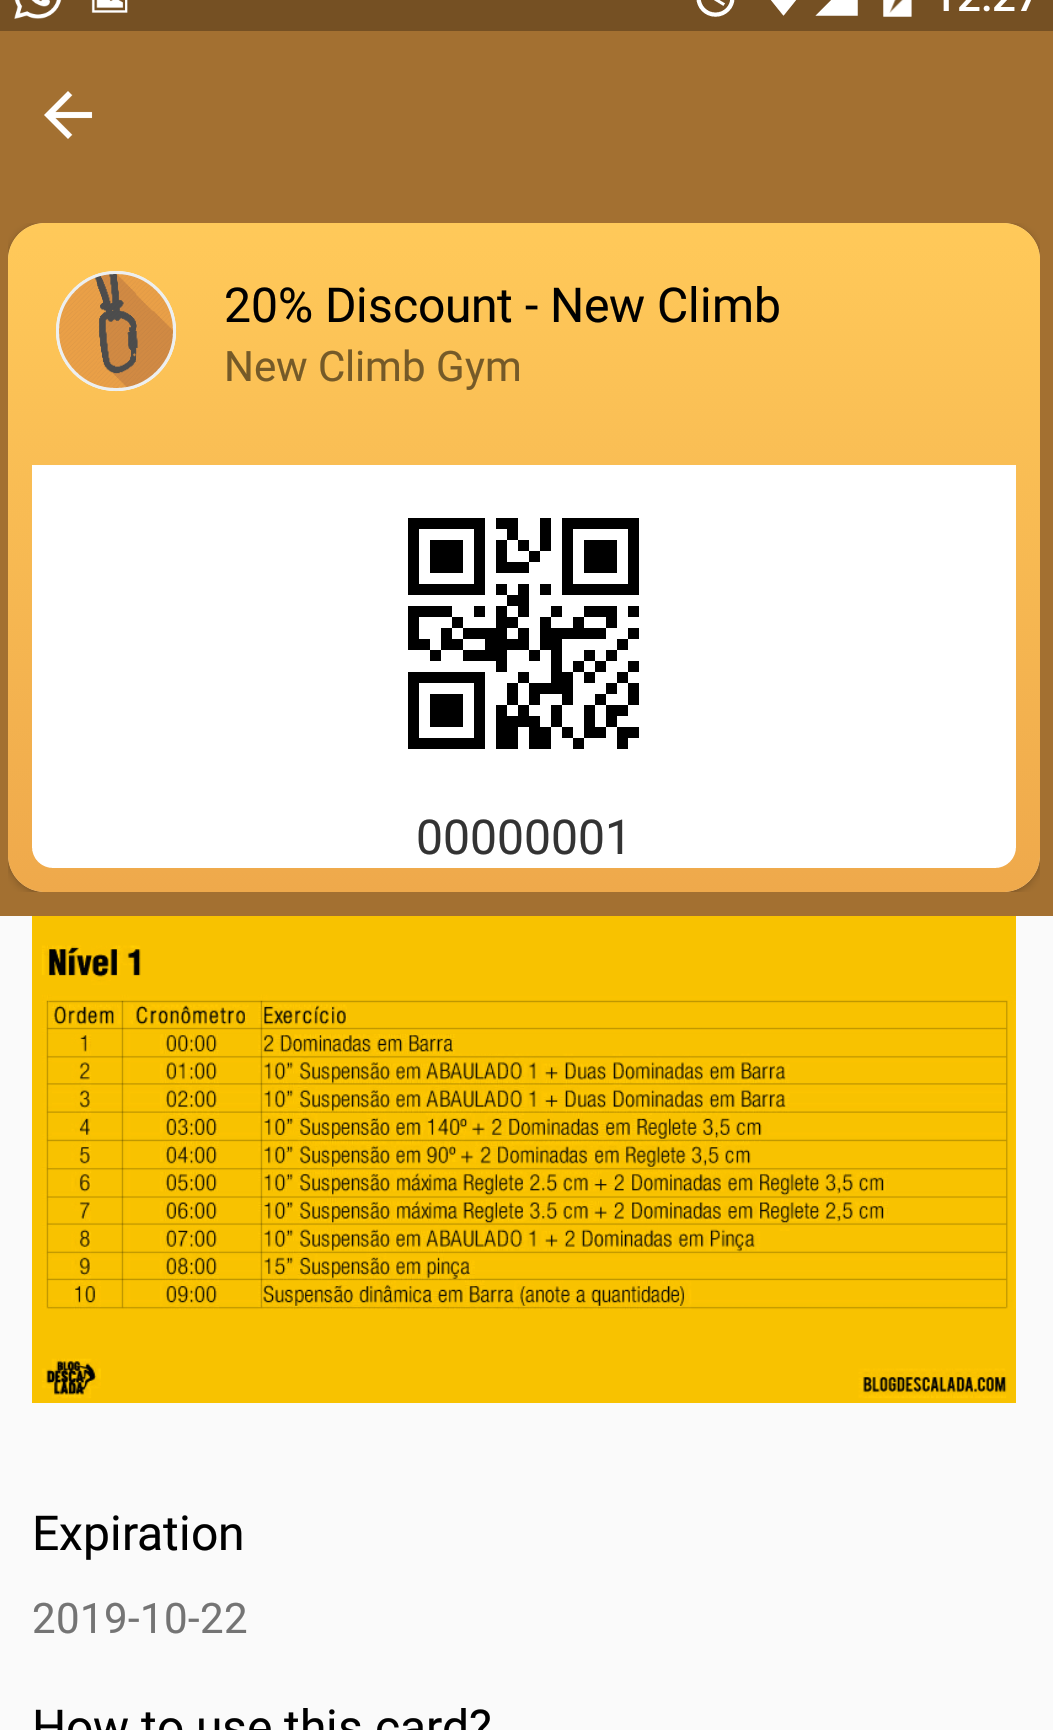 Figure 8 - Pass Details
Scrooling it down and you can see all the details:
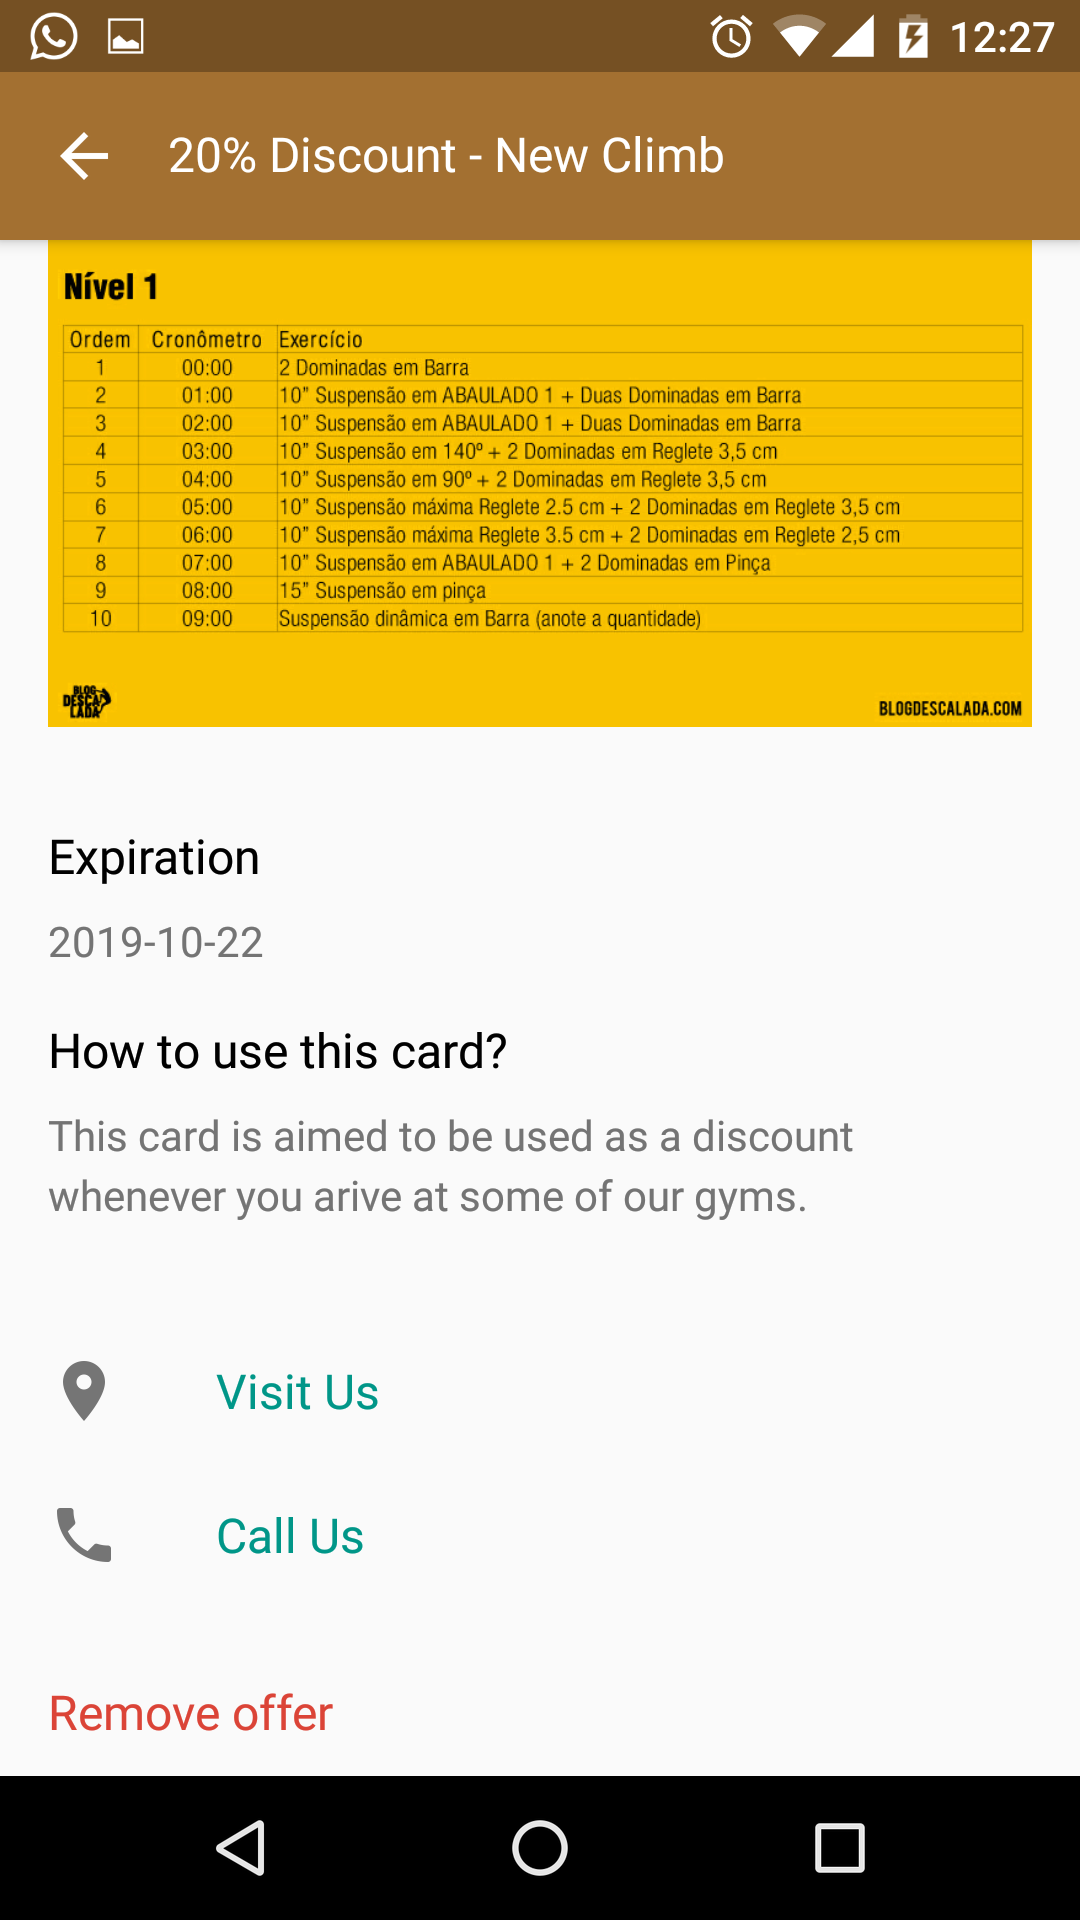 Figure 9 - Pass Information
Notifications
Remember: There is no custom Push Notifications at Android Pay. They’re only available through geolocation basis.
If you’ve added locations to the pass. As soon as the user reaches a specific area (100m radius) the notification will pop out automatically.
The user will be able to see it at the header:
![]() Figure 10 - Header Icon
Figure 10 - Header Icon
The Lock screen also shows the information:
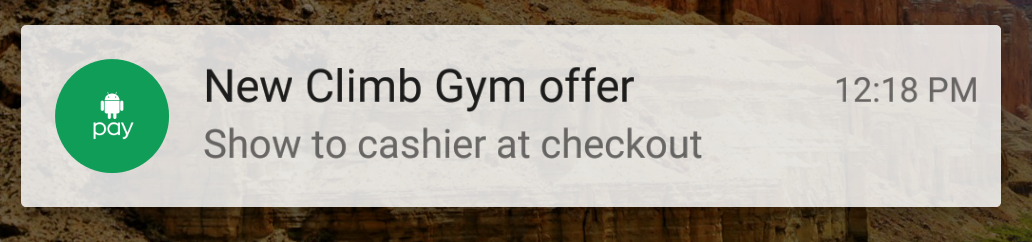 Figure 11 - Lockscreen Notification
And finaly, even without opening the app, the user can use the barcode at the notifications’s previews.
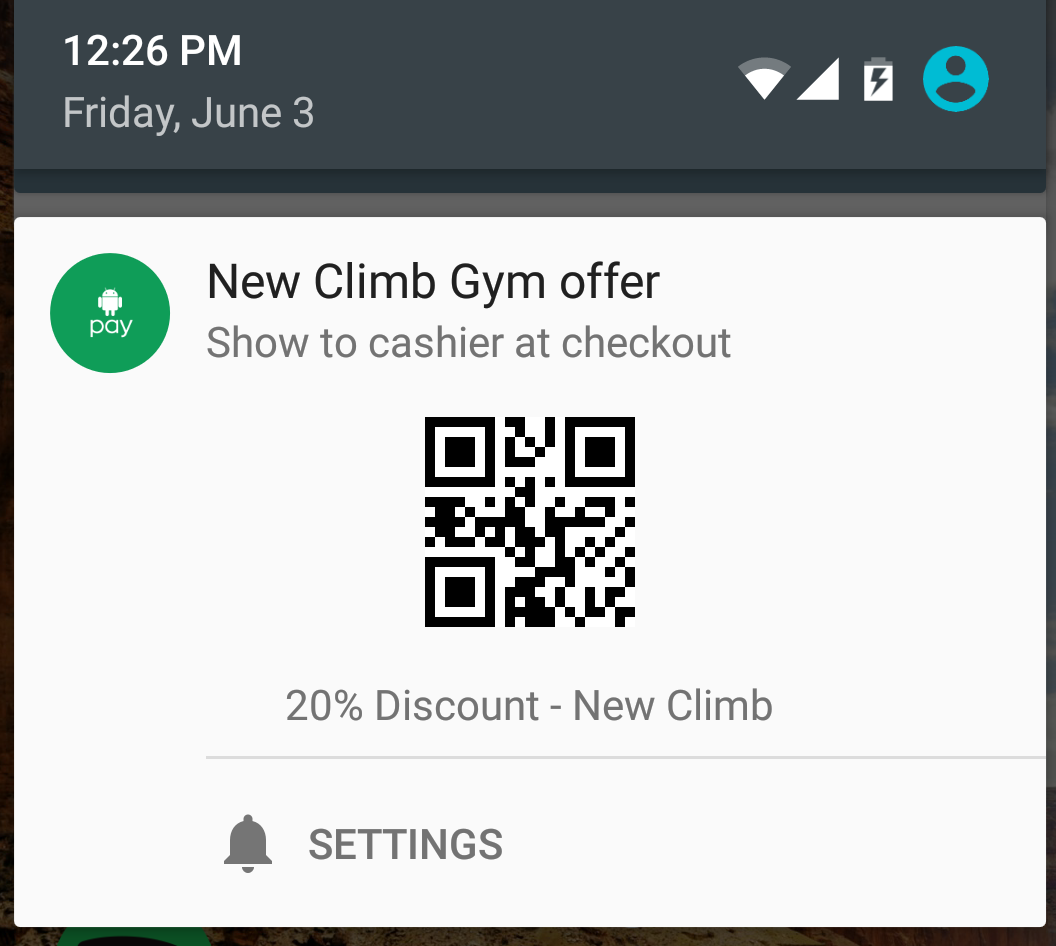 Figure 12 - Header Preview
Redeem a pass
Basically, the user just have to show the pass to the merchant and it should be able to redeem it.
For more information check our Redeeming Documentation